

The cornerstone to learning how to penetration test and hack is to have your own lab set up. In this scenario we will set up our own Kali Linux Virtualbox lab. If you are serious about learning then it is the very first thing you should do. The reason being is that once you get your lab set up you will be able to start running sample tests to see how they work. Every pentester has one, and reading about how to conduct penetration tests won’t get you anywhere; you will actually need to get your hands dirty.
Initially we are going to quickly put together the most rudimentary network that you can use to learn and sharpen your skills. Simplicity is key. Eventually you can add new machines to attack after we initially get set up together. The idea here is that we don’t want to become overwhelmed, so starting small and expanding is the way to go.
For now we are going to start with three machines: Kali Linux (which will be our attacking platform), Metasploitable 2 and OWASP WebGoat. We want to create a network where we have one platform for penetration testing, one platform that was built to be vulnerable and one web application that was built to be vulnerable.
Kali Linux if you don’t know is the gold standard open source penetration testing operating system created by Offensive Security. Operating systems don’t make the penetration tester, but if you are serious, Kali Linux was developed solely for this purpose and will make your life a whole lot easier. Many of the tools are built right into it.
Metasploitable 2 is a vulnerable Ubuntu Linux operating system created by the Rapid7 Metasploit Team that was designed for training purposes just like this. This will make it much easier for us to find vulnerabilities in the target machine and will allow us to get some good experience in penetration testing. We will also be much less frustrated at the beginning because we weren’t able to find any issues right away.

WebGoat is a project created by OWASP and is in the same vein as Metasploitable 2. The difference is that it allows us to test our skills out on a web application instead of an operating system. It is an amazing application because there are lessons within it and it allows you to run the tests right in the application as well. This will allow us to broaden our skills and be more ready to meet the demands of the increasing need of pentesters that can work on web apps.
After we are done our virtual network will look something like this (note that this is just an example as everyone’s network is unique):
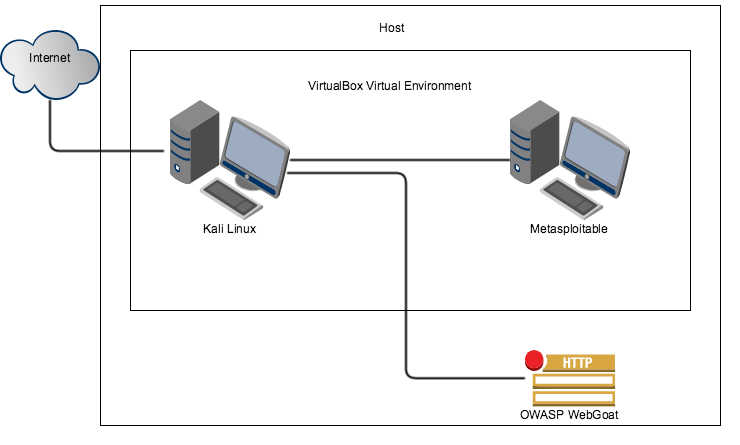
As you can see this is very simple but is all we need for right now. As stated earlier, as our skills improve so will our network.
This tutorial is going to focus on setting up this virtual lab using VirtualBox because it is free and anyone can set it up this way. There are also many other tutorials you should be able to find with a quick Google search on how to install virtual machines on any operating system or virtual setup that you might be using.
The first thing we need to do here is download VirtualBox. You can pick this Oracle product up here: https://www.virtualbox.org/wiki/Downloads
After you have installed VirtualBox we need to create a DHCP server and network within VirtualBox that we will use later.
Browse to where you have virtual box installed at the command line and type: vboxmanage dhcpserver add –netname mydhcpnetwork –ip 10.10.10.1 –netmask 255.255.255.0 –lowerip 10.10.10.2 –upperip 10.10.10.10 –enable
(Note: If you are on windows you have to append the extension “vboxmanage.exe”)
This gives us a DHCP server and 9 other IPs to play with. However, you can increase the number to whatever you like.
Now that you have VirtualBox installed we need to install our platforms (Kali Linux, Metasploitable, OWASP WebGoat).
Kali Linux
You can get your Kali Linux virtual machine from https://www.kali.org/downloads/ I suggest torrenting the download over the direct download as it is faster and I’ve had instances where the direct download was corrupted. If you’ve never torrented just go with the direct download and hope it works. When this finishes make sure that the Sha1sum matches what you see on the Kali Linux webpage. You can check this by:
Microsoft’s tool: http://www.microsoft.com/en-us/download/details.aspx?id=11533
For Mac simply type in the terminal: openssl sha1 <path to file>
Linux: sha1sum <filename>
Going forward you should always check for SHA or MD5 hashes and compare those to what they should be, as this is a prudent step to prevent malware on your computer.
The first thing we will want to do after verifying our hash is to install Kali Linux on VirtualBox. Click on New.
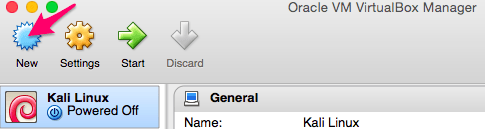
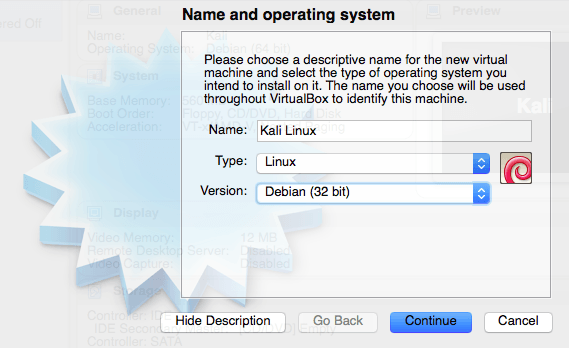
You can make the name of it anything you want, but will need to select Linux as the “Type”. The version you choose will either be Debian (32 bit) or Debian (64 bit) depending on what version of the Kali Linux OS you downloaded. For this example I downloaded the 32-bit version.
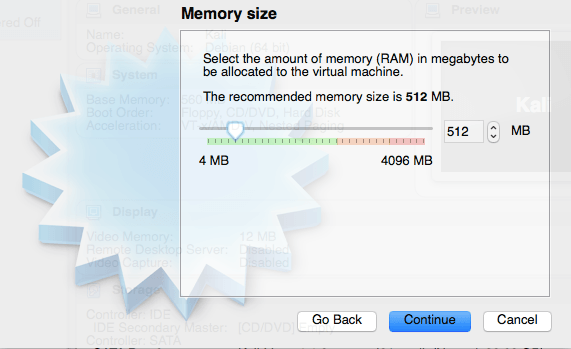
Set your memory size. While 512 is the default and you may get away with this, it is possible that you’ll get into some trouble later running certain applications so I suggest you increase it to something higher. Nothing is worse than being right in the middle of something and your Linux platform freezes. However, the beauty of VirtualBox is that you can go back into the settings and simply readjust this at any time.
We will be creating a virtual hard drive so select that and click Create.

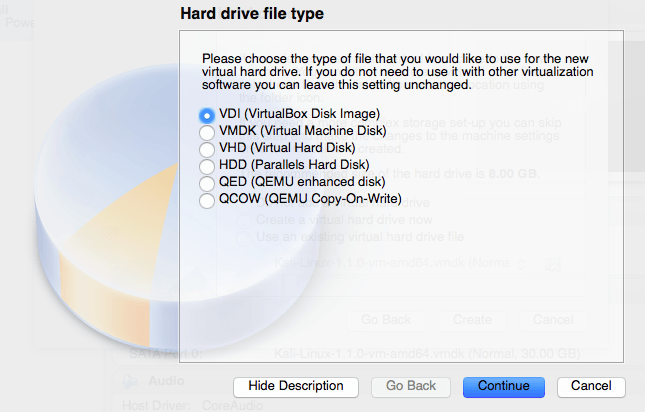
For this example we will be using the VirtualBox Disk Image.
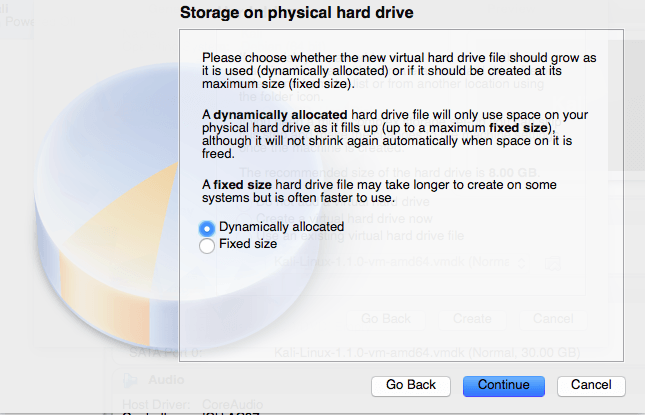
We want a Dynamically allocated hard drive for this example.
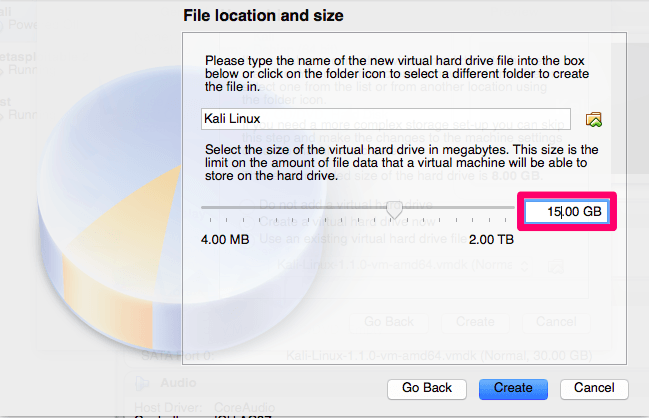
For the size you probably want to increase it to at least 15GB. I’ve had issues with the installation when going with the standard size of 8GB.
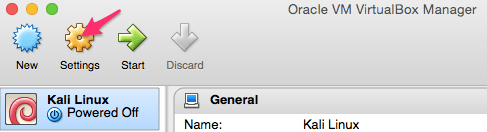
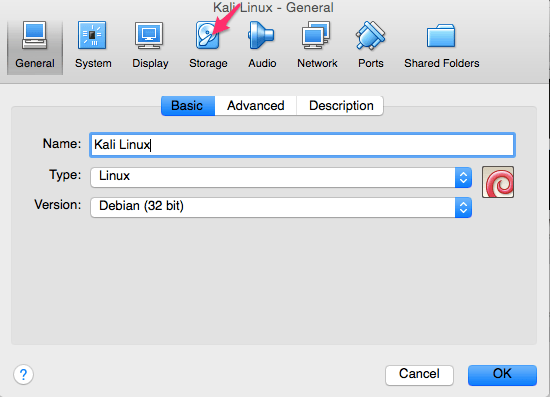
Now that we have created our new Kali Linux virtual machine we need to configure it, so select settings and then Storage.
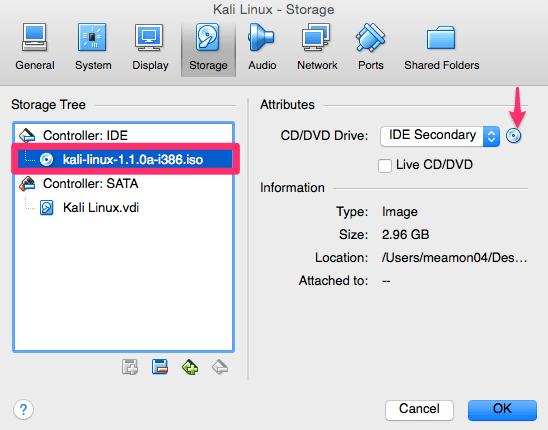
We now need to add the ISO that we previously downloaded. We do that by highlighting the area you see selected below. At first this should say “Empty”. After “Empty” is highlighted you then need to click the CD where you see the arrow below and browse/select where you have your ISO located.
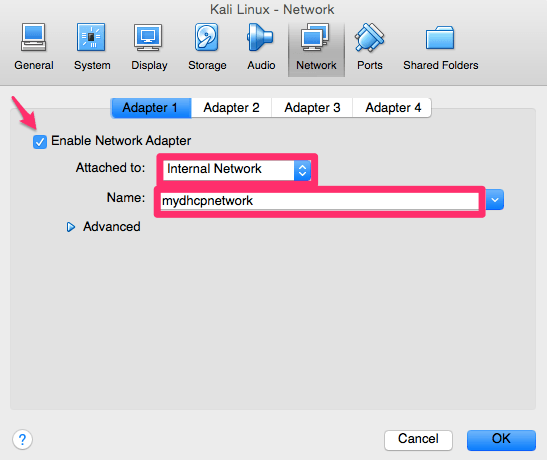
For Adapter 1 we will be using the DHCP server and network that we created earlier for our internal VirtualBox network.
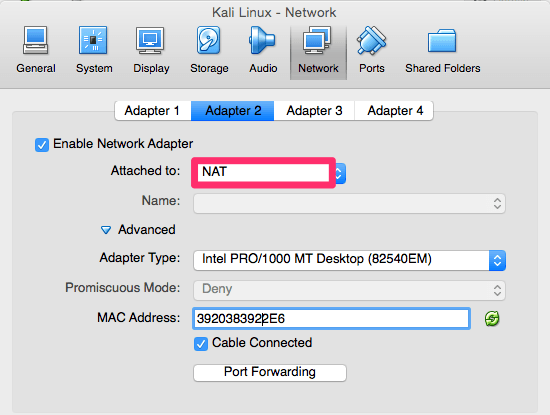
We also need our Kali Linux platform to reach the Internet, so for that we will be using Adapter 2. Attach it to NAT and then hit OK.
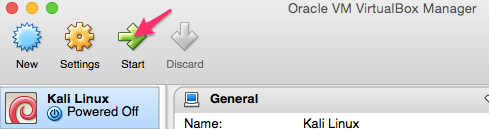
Highlight and now start your new virtual machine.
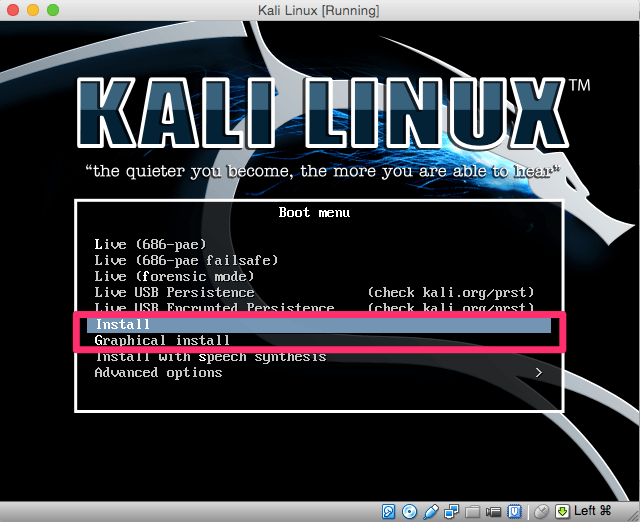
You could actually use Live below and boot right into the system, but I suggest that you actually install Kali Linux on to the virtual machine. Choose the Install or Graphical Install below and follow the steps.
Depending on how you are installing your system and what version of the install you are using, you may encounter the following error when starting up the install:
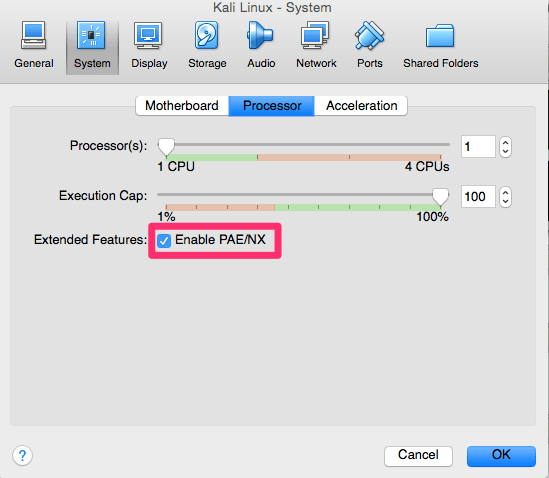
If you get this error go back to settings, System, Processor and select “Enable PAE/NX”.
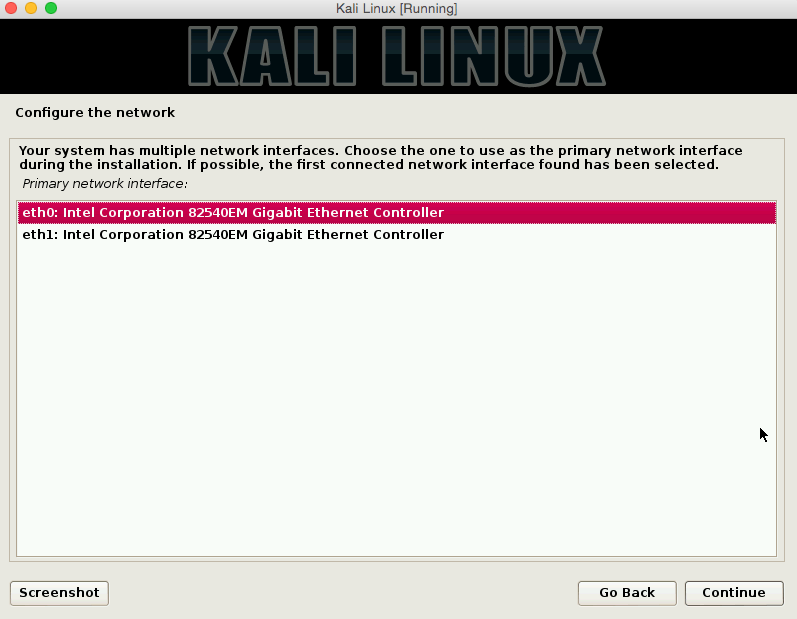
During the setup you will be asked to configure the network as well. Because we created two adapters you will see something like eth0 and eth1 below. What you will need to do here is select the interface that allows you out to the Internet. In my case this is the NAT interface we created earlier and is eth1.
After logging into your fresh Kali Linux install the first thing you will want to do is verify that you can reach the internet by opening up your web browser. If you cannot browse the web you need to enable DHCP from your command prompt with: dhclient -v
Now that everything has been set up properly we need to update Kali Linux so that we KNOW that we have the most recent distribution and tools. You can do that with the following at the command prompt: apt-get update && apt-get upgrade
Metasploitable:
Installing your vulnerable Metasploitable 2 operating system is very similar to how you installed Kali, just with fewer steps.
To start you will need to download the files from here: https://information.rapid7.com/metasploitable-download.html
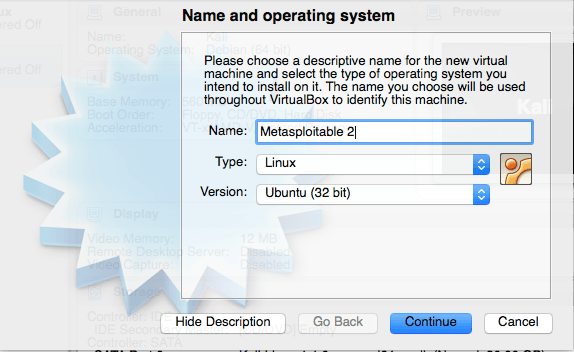
Again, create a new virtual machine:
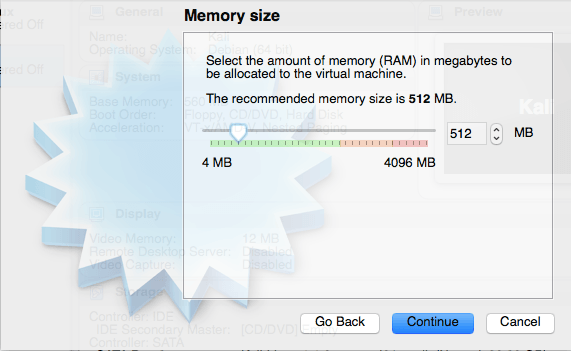
Again, set your memory size.
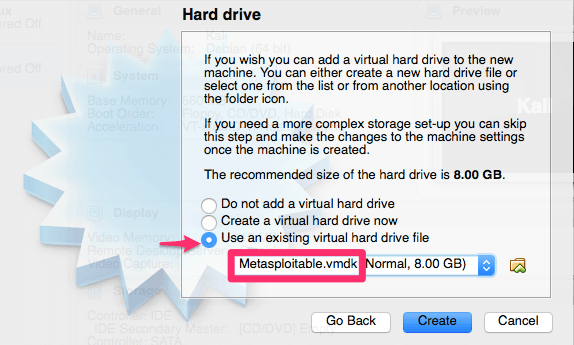
This is slightly different than the Kali Linux setup because we will be using an existing virtual hard drive as you can see below. Just select where you see the arrow and then browse to where you saved the highlighted file.
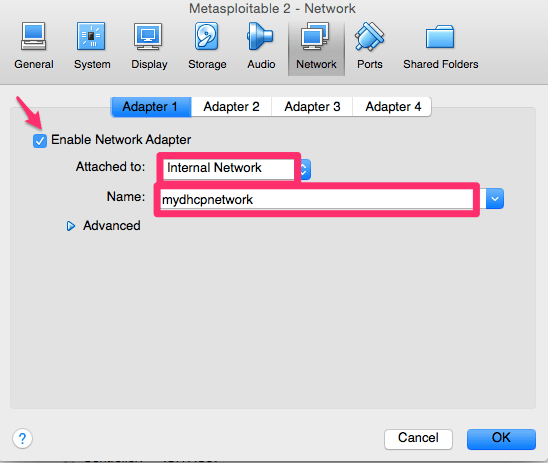
Like we did for the Kali Linux setup we will need to click on settings once again. We need to make a modification in the network section as we did for our Kali Linux platform.
Start your new Metasploitable 2 virtual machine.
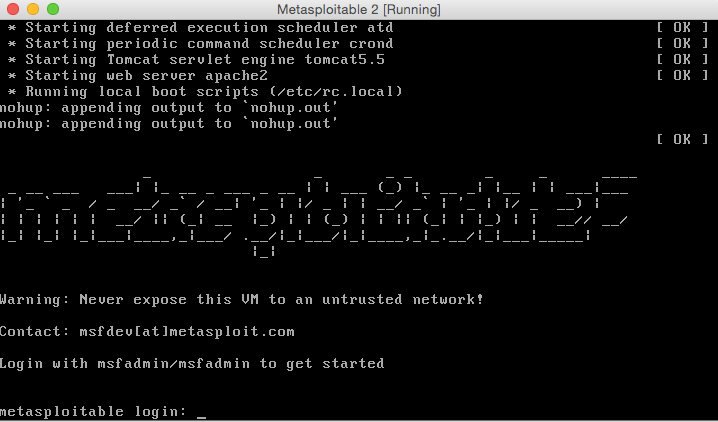
The Default username and password after you run your machine will be:
Username: msfadmin
Password: msfadmin
Password: msfadmin
OWASP WebGoat
To get the latest version of WebGoat just go to https://github.com/WebGoat/WebGoat-Legacy/releases and download the latest release at the bottom of the page.
To get started on this you will have to have the Java Platform installed on your computer first if you don’t already. You can get that here: http://www.oracle.com/technetwork/java/javase/downloads/index.html
You also need Apache Tomcat for this as well. You can find a stable release here: http://tomcat.apache.org/whichversion.html
Copy the latest version of WebGoat to your working directory and in your terminal type: java -jar WebGoat-6.0.1-war.exec.jar
(note that depending on which version of WebGoat you get at the time of reading this it could be slightly different)
(note that depending on which version of WebGoat you get at the time of reading this it could be slightly different)
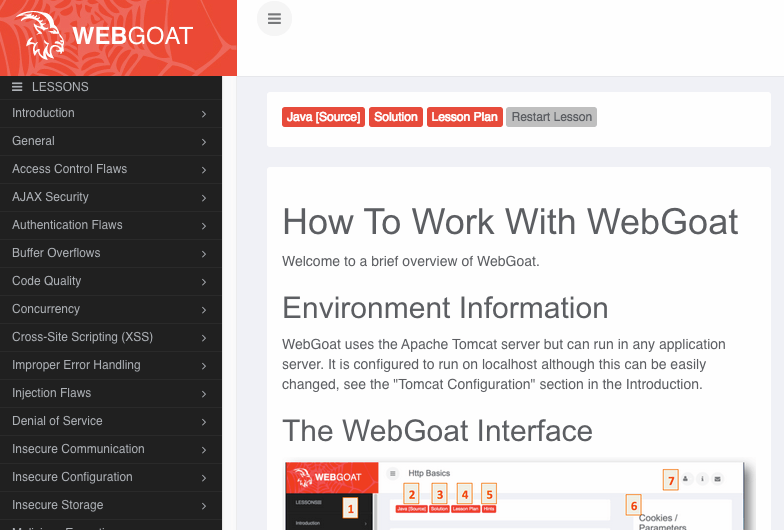
To get to the login screen browse to http://localhost:8080/WebGoat with your web browser. On the login screen you will see both the guest login and admin login and password. After you log in you will be able to see all of the lesson plans:
If you installed all three of these platforms then you have plenty to get you started on your journey of learning how to hack in to the information security and pentesting space.
This network is now the perfect venue for a student like yourself to test out their skills and techniques without the fear of permanently damaging or destroying your own network/systems, or someone else’s for that matter.
I’ve provided some bonus content that will help you customize this pentest lab to start the DHCP server every time, creat a share drive to share files between the lab and your computer, enabling sound, securing your kali linux virtualbox machine and few other things.


