
Welcome back everyone! Today we start a brand new series about mobile hacking. This article will be an introduction to the concepts we’ll cover throughout the series, and a tutorial on how to build our own mobile hacking device. So, without further adieu, let’s get started!

Introduction and Overview
Smartphones are everywhere. Most people carry one with them majority of the time. Imagine if we could turn a cell phone into an advanced hacking machine, capable of launching targeted attacks. We’d be immensely powerful in the world of mobile devices. Being able to hack from a mobile devices comes with insanely valuable advantages. Throughout this series we’ll be learning to use these advantages in order to further enhance our hacking abilities.
Now that we have a premise for this material, we need to explain what we’ll be covering in this series. In order to avoid divulging too much information about the upcoming articles (no spoilers!), I’ll give a general overview instead of a specific timeline.
- The advantages and disadvantages of mobile hacking
- The different options in mobile hacking equipment and setups
- Also including the pros and cons of each set
- Mobile specific hacks
- Hacks that can easily/only be performed on a mobile platform
- Mobile v.s. Mobile
- Hacking mobile devices with mobile devices
- Additional (optional) mobile equipment for specialized attacks
It may not seem like a lot, but trust me, these topics will seriously help us grow and develop as hackers.
Building our First Mobile Hacking Device
Now that we have a basic overview of what we’ll cover throughout this series, we can move on to building our own hacking device! We’ll start by explaining the tech behind the device we’re going to make, and then we’ll get right into it.
It’s time to introduce a company that made the technology we’ll be using today, Pwnie Express. Pwnie Express makes a variety of hacking devices available for purchase. Among these devices is the Pwn Phone. Normally you’d have pay a little over $1000 for a Pwn Phone. But for those with enough ambition, the Pwnie Express maintains the AOPP (Android Open Pwn Project), which allows us to build our very own Pwn Phone! Just a heads up; the AOPP only supports a handful of devices, before continuing, I recommend you make sure your device is supported!
Now that we know where this technology is coming from, we can get building. We’ll be building our Pwn Phone out of a LG Nexus 5, running completely stock ware. So, let’s get started!
Step 1: Download Needed Files
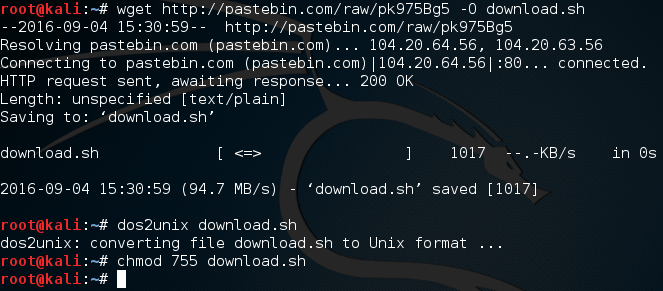
In order to start making our pwn phone, we need to download a handful of files. Since we here at Hacking Loops care about you, I’ve made a simple BASH script to do all the downloading for us. We need to download this script, format it, and make it executable. Let’s do all that now:
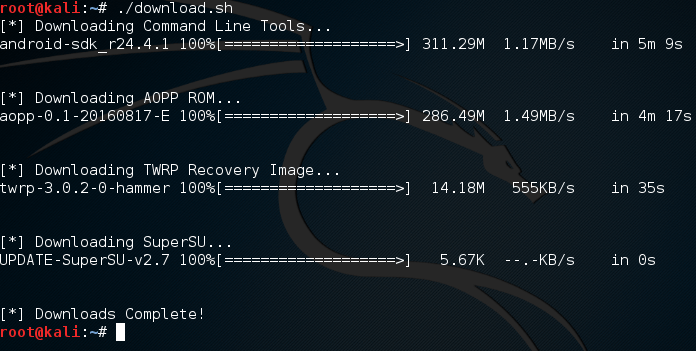
Now that we have this download script, all we need to do is execute it and wait. These files are quite big, so you’ll need to have some patience. It will store all the downloaded files in a new directory named project. So, let’s execute this script and wait:
Now that we have these files, we need to do some work with them before we continue.
Step 2: Unpack the Android Command Line Tools
In order to work with our Nexus, we need to use the Android SDK platform tools. In order to use these tools, we need to unzip the Android file we downloaded in the project directory:
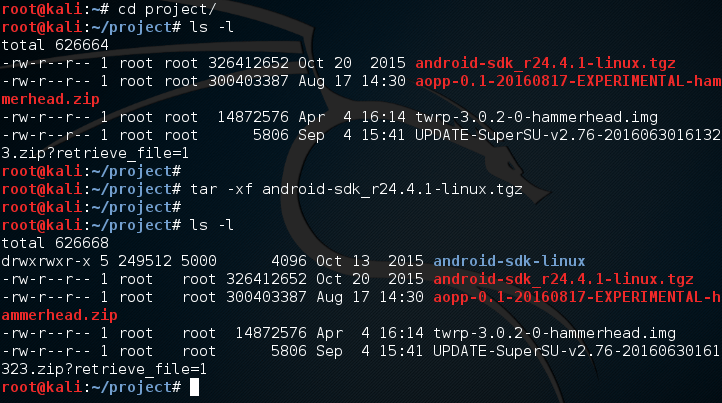
Here we use the tar command in order to extract the Android SDK zip archive into a new directory name android-sdk-linux. Inside of this new directory is an install tool that we need to use in order to install the proper platform tools. Let’s move into this directory and use the update tool:
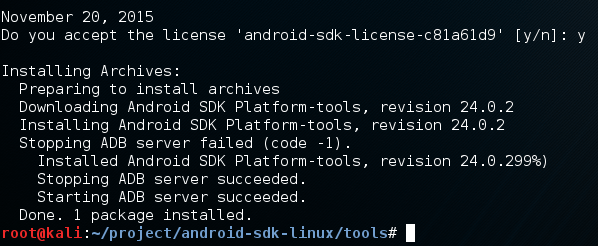
By using these settings with this install tool, we can install just the platform tools, not any of the other software that would be installed by default. Once we execute this command, we will receive a LOT of output. Eventually we’ll be given a prompt asking if we accept, answer yes and we can continue:
Now that we’ve finished the install, a new directory can be found one directory up named platform-tools. We need to add this directory to our PATH so we can use the tools from anywhere, which will make our job way easier:

Now that we’ve added this to our PATH, we need to do some work on our device before we can continue.
Step 3: Enable USB Debugging
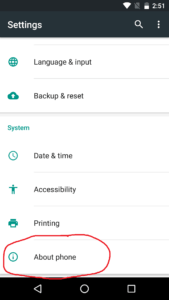
Before we can continue, we need to enable USB debugging on our device so we can modify it from our Kali system. In order to enable USB debugging, we first go to ‘Settings’, and scroll all the way down to ‘About phone’:
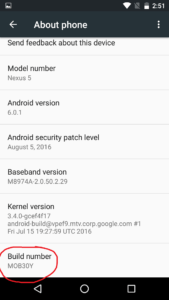
Inside of this option we see a large amount of information about our device. Near the bottom of the menu, we can see a tab labeled ‘Build Number’:
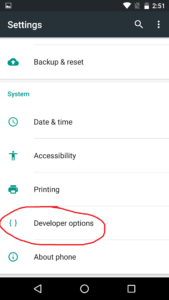
If we keep tapping the build number option, we will unlock developer options for our device. Once it happens we will be given a notification:

Now that we’ve been given this notification, we can go back to the main settings menu and see a new option:
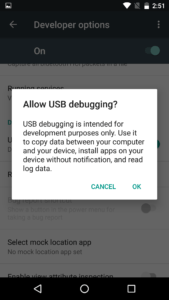
Developer options allows us more power over our device, including the ability to enable USB debugging. Around the middle of the menu we can find the option to enable it. Once we do, we will see a prompt asking for us to confirm our decision:
There we go. Now that we have USB debugging enabled, we can continue.
Step 3: Unlock the Bootloader and Install TWRP Custom Recovery
In order to install the AOPP, we need to install it through a custom recovery. If we’re going to use a custom recovery, we ought to install one first! We’re going to be install the Team Win Recovery Project (TWRP for short). This will allow us to backup and install software on our device easily.
But, there’s a catch. In order to install TWRP, we need to unlock the bootloader. This is incredibly easy so let’s just get it out of the way. Inside of the compressed file that we setup earlier is a tool named fastboot. This tool allows us to interact with the device while it’s in the fastboot state. In order to access the fastboot menu, power down your device, then hold the power and volume down buttons at the same time until a menu with an open android appears.
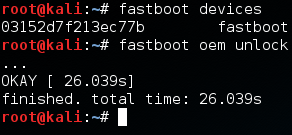
Now that we have the fastboot menu open, we need to make sure our Kali system is recognizing the phone. We can tell fastboot to list all the devices current connected. Once we do that we’re going to use fastboot to unlock the bootloader so we can install TWRP. Let’s do these things now:
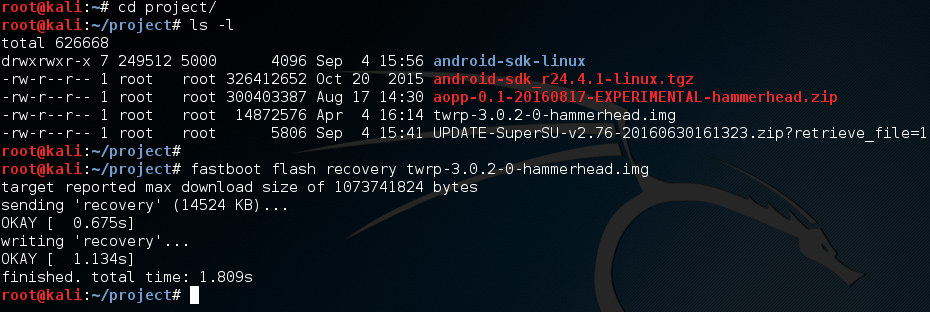
Now that we have the bootloader unlocked, we can flash the TWRP recovery image to our device. We also use fastboot for this, and the process is rather simple. Let’s flash TWRP now:
Now that we’ve installed a custom recovery, we can continue.
Step 4: Install the AOPP ROM
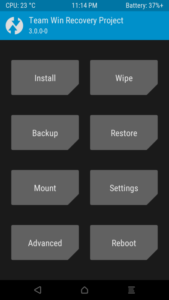
Now that we can use our custom recovery, we can install the AOPP. In order to boot into our recovery, we need to select the “Recovery” option from our fastboot menu on our device. You can scroll through the options by using the up and down volume buttons, and choose the selected option with the power button.
We should see the boot screen for TWRP, once it loads it should look something like this:
Now that we’re in TWRP, we need to do some wiping. To do this, we need to select the “Wipe” option, and select everything except Internal Storage and then swipe the bar at the bottom of the menu. After a few seconds, the wipe should be successful.
Now that we have wiped our system, we need to move the AOPP file over from our Kali system to our device. We can do this using a tool known as android debugging bridge (adb). We need to stay in recovery mode to use adb, so let’s use adb to see if the device is ready. If it is, we’ll push the zip file from our Kali over to the device:

Now that we’ve pushed the AOPP zip file to the device, we need to go back to the main TWRP menu. From here we select the “Install” option. Once we select this option we should see a space that lists file names. Among these names should be the AOPP that we pushed to the device. Select this file and follow the confirmation prompts to flash it to the device.
Alright, we’re almost done installing AOPP. There’s only one more thing we need to do. We need to push the SuperSU zip file to the device, let’s get that out of the way:

Now that we have all this in place, we should be able to reboot our device. Only one more step to go until have a fully functional pwn phone!
Step 5: Setup the Pwn Phone Environment
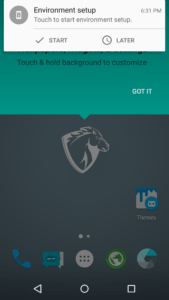
This final step is very easy. All we have to do is boot into our new system and follow the setup prompts. Once this is complete, we will be greeted with the pwn phone home screen. But you may notice something, we don’t have any tools yet!
In order to get the tools we need, we need to setup the Pwnix environment. There should be a notification at the top of the screen prompting us for to setup the environment:
Once we select start, we will be prompted by SuperSU asking us if we want to allow the Pwnix setup root access. Once we grant it root permission, the setup will begin. Once the setup is complete, we’ll be prompted to restart to finish the install:
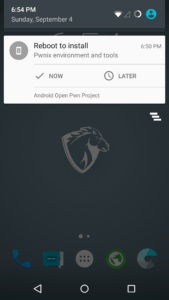
Once we restart we should have quite a few tools ready for use. But if we want to greatly expand the amount of tools on our device, we need to perform an update. We should have an update prompt at the top of the screen in the same place the setup prompt was. Once we perform this update we should have a fully fledged pwn phone!
There we have it! We successfully built our very own pwn phone. This device is incredibly powerful and I intend to prove it. In the next article we’ll be going deeper into the advantages of mobile hacking. I’ll see you there!


0 comments:
Post a Comment